When I am baking a pie from fresh fruit, I usually use flour or cornstarch for my thickener. However, when it comes to canning pie filling, these thickeners don't work. Though I have seen sites on the Internet that say to use cornstarch, it doesn't stand up to being heated twice. The pie filling may be thick when the jar is put up on the shelf, but by the time the pie comes out of the oven, it is runny.
Furthermore the USDA says that using cornstarch as a thickener for canning is not safe. Apparently it prevents the food from heating evenly so the center may not get hot enough to kill mold and bacteria.
One solution is to can your fruit without the thickener and add the thickener before you put it in the pie shell. However this doesn't allow for the convenience of just opening the jar and pouring it into the pie shell.
When the USDA approved ClearJel® (modified corn starch) for use in home canning, I confess that I was slow to try it. I was full of questions like, "how do they modify it? Do the modifications make it bad for your health? Isn't one of the advantages of home canned food suppose to be that you don't have funny sounding ingredients in your food?"
Never mind that sugar cane is very highly modified before it ends up on your table on the form of granulated sugar, or that granulated sugar is definitely not a health food. After all, I have been acquainted with sugar all of my life. It is not something new and unfamiliar.
I tried reading up on how corn starch is modified to become ClearJel®, but that was over my head. I did finally end up deciding that I have not found any research yet which says it is bad for your health, and when you consider how much modification goes into something like sugar, maybe my real problem was just that I was afraid to try something new.
I have to say, that ClearJel® works quite well. In addition to thickening pie fillings, it can also be used as a thickener for canning things like creamed corn.
It can also be used in place of pectin in jam recipes, but I have never tried it. Maybe I should. For information about using ClearJel® in jam, refer to this article by Washington State University.
Read more...
Friday, June 19, 2009
ClearJel®
Wednesday, May 27, 2009
A Little More about Food Safety when Home Canning

This should be my last post about food safety. I have covered that topic pretty well and it is time to move on.
One thing that I would like to point out, is that the high altitude instructions begin at just 1,000 feet. You don't have to live in the mountains to be that high. Even parts of Iowa are over 1,000 feet. Type your location followed by the word "elevation" into your search engine. You might be surprised.
The other thing that I would like to write about is unsafe canning methods. Here is a description of what NOT to do.
Open Kettle Method
The open kettle method was once a pretty common canning technique. Basically you boil your jars and all of the equipment that you are using, add the hot food, add the lids, and cross your fingers. I include crossing your fingers as one of the steps, because numerous studies have shown that the open kettle method is not very reliable.
Personally, I can remember my mother using this method when I was small. It was the times that she found spoiled food on the shelf that led her to decide that instead of just doing things the same way her mother had, she needed to read up on food safety and update her technique.
As somebody who sort of collects old cookbooks, I have several recipes that say, "pour into sterilized jars and seal." You even occasionally come across a new cookbook written by somebody who has obviously has not been keeping current with the research out there. I admit that I use these recipes, but I always update the canning instructions.
The Paraffin Wax Method
This method was once common for jams and Jellies. Unfortunately, it too is not a reliable method. Any jam recipe that says, "pour into sterilized jars and seal with paraffin wax." should be updated to, "Fill hot jars leaving 1/4 inch headspace. Add lids and process in a water bath for 10 minutes."
Other Unsafe Methods
People who are looking for easier ways to do things have came up with all sorts of interesting ideas such as; putting a tablet of aspirin in each jar, processing jars in the stove, processing them in the microwave, and even processing them in the dishwasher. For safety sake, please do not try any of these.
Whew! When I started blogging I didn't know that it would take me 8 posts just to cover the topic of food safety. I almost wrote a book. Well, it is an important topic, so I don't think that I over did it.
Read more...
Friday, May 22, 2009
Choosing Canning Jars

To ensure the most reliable seals, you should always use jars with two piece lids. The jar itself can be reused. Check each time to be sure that there are no nicks in the rim. The screw band (which holds the lid in place during processing) can also be reused as long as it is in good condition. However, the lid should only be used once.
I give canned goods as gifts, and request that people return the jars, to be reused. I have found that most people do actually return them. I knew one woman who would even tell people, "if you don't return them, you don't get a gift next year." I have never gone that far.
Standard jars have a mouth that is about 2 1/2 inches in diameter. Wide mouth jars are about 3 inches. If you are filling the jars with something large (peach halves for example) the wider mouth can make it easier to get the food out.
Plastic Storage Caps that are made to fit on the canning jars can be handy after you have opened your jar and you want a convenient lid for storing your open jar in the refrigerator.
Canning Jars with Wire Clamp Lids may have been the most reliable jars at one time, but they are not as reliable as two piece lids. Research shows that you are less likely to get a proper seal with them. Further more, since they do not have a safety button, you have no way of knowing whether or not the jar is sealed. These jars are nice for storing macaroni or dried beans. As for canning with them; why take a chance if you don't have too?
When I was a child, I knew a woman who would reuse jars and lids from the grocery store. I strongly discourage this. These were not designed for home canning. I suppose this would be a little less tempting today, since most everything in the grocery store is plastic.
Read more...
Monday, May 18, 2009
Home Canning: What about Botulism?

I had planned to write a post about botulism next month, when I get more into canning low acid foods. Due to comments and e-mails from people that are afraid of poisoning somebody, I decided to move up the date.
Of all the unwanted organisms that might live on your food, the Clostridium Botulinum bacteria has to be the scariest. You can't see it; you can't smell it; and you can't taste it; yet it can kill you. Talk about scary.
So how do you protect yourself?
Once again, I will divide foods into two categories, high acid foods (food with PH below 4.6 such as pickles and most fruits) and low acid foods (food with a PH above 4.6 such as vegetables and meats).
High Acid Foods
For high acid foods, my discussion is short. Clostridium Botulinum will not grow in these food. If you have been afraid to can these foods, for fear of botulism poisoning; relax, breath a sigh of relief, and start canning. Just remember, that while bacteria will not grow in these foods, mold and other fungi will, so be sure to process your food in boiling water for the length of time specified in the recipe. The heat from the boiling water is necessary to destroy mold.
Low Acid Foods
Now we get into a discussion of why I keep emphasizing that low acid foods need to be processed in a Pressure Canner. The reason I go into details of what can go wrong is not to scare new people away from canning, but to give you enough information that you are prepared to can food safely.
Let's say you pick some green beans from your garden or buy some ears of corn from the farmers market. This food is bound to have dormant spores of the Clostridium Botulinum bacteria on it. These spores are so common that their presence is inevitable. The reason why they are in their dormant state is because they need a low oxygen environment. As long as they are exposed to air, they must remain in their dormant state.
Even after you wash your food, some of these dormant spores will remain on the food. It is nearly impossible to wash them all off. Fortunately eating these dormant spores, does us no harm. You eat the all them time, you just never knew it.
Now let's say that you decide to can this food. Let's also say that for whatever reason, you did not process it at the proper pressure for the proper length of time to ensure that all the spores are destroyed.
Now you sit your jar of food on the shelf to eat later. These spores are now sitting in a cool, moist, low oxygen, low acid environment. This is just the environment they have been waiting for. They come out of their dormant state and start actively growing. As the bacteria grows, it release a chemical that is toxic to humans. In as little as 3 days, your jar of food will be poisonous.
OK, I Know That I Need To Use A Pressure Canner, But I Am Still Scared.
Now let's say that you were very careful to process the food at the specified pressure for the specified length of time, but you are still worried that one of those spores might have some how survived. How can you tell?
The bacteria doesn’t discolor your food, or cause a funny odor, but it does still give its presence away. As it grows, it releases a gas which loosens the seal on your jar. In a properly sealed jar, you should need a jar opener to get the lid off. You should not be able to pull it off with your fingers. Any jar with a loose seal, should be considered contaminated.
As I said before, the reason I wrote this is not to scare people away from home canning, but to encourage people to practice safe canning. A lot of research has been done over the years. We now know much more than we once did about what canning techniques are safe and what techniques are not safe. If you take advantage of what has been learned, home canning can be a very rewarding experience.
Read more...
Wednesday, May 13, 2009
Modifying Canning Recipes and Food Safety

Lets say that you have a canning recipe that says to process with the water bath method. Being the creative cook that you are, you want to make some modifications to the recipe. After all, having your own flair is what makes cooking fun. The only question is, " is it still ok to use the water bath method?"
The fact that the recipe says to use the water bath method means that the PH of the recipe is lower than 4.6. Anything with a PH higher than 4.6 must be canned with a pressure canner in order to ensure that any bacteria in the food is destroyed.
Now lets say that you want to add blueberries to your recipe. Fortunately the US Food and Drug Administration has a website that will tell the Approximate PH of Foods. If you look up blueberries, you can see that their PH is below 3.33. Since this is lower than 4.6, you are still safe to use the water bath method.
Assuming that you don't have a PH meter among your kitchen utensils, it is best to take a, "better safe than sorry," approach to recipes of unknown PH. In other words, if you add even one ingredient with a PH above 4.6, then assume that the whole recipe has a PH above 4.6.
Removing an ingredient can also be a food safety issue. For example if you look up the PH of tomatoes, you will see that it is in the range of 4.3 to 4.9. Tomatoes really straddle the line of what is safe to can with a water bath method. For this reason, many recipes for canning tomatoes call for lemon juice in order to add enough acidity to ensure safety. It wouldn't be wise to take the lemon juice out of the recipe. If a recipe calls for lemon juice, vinegar, or ascorbic acid (vitamin C), then do not remove or decrease the quantity of this ingredient.
A key to food safety is just to remember that if the PH is above 4.6 then you must use a pressure canner - not a water bath canner.
Read more...
Monday, May 4, 2009
Processing Canning Jars with the Pressure Canner Method
Much of this is similar to the water bath method, so I debated about just saying "make these adjustments." For clarity sake, I decided to write the whole thing out.
Thank You, Moxie, for telling me how to get my blog to just show part of a post. Hopefully my decision to do that is an improvement.
Pressure canner Method
As mentioned in my first food safety post, the pressure canner method should be used for any low acid food such as vegetables or meat. In this post I go into a step by step description of this processing method.
Supplies you will need
If you are new to canning, you can buy a Canning Kit rather than buying each piece separately.
Preparation
Filling the jars. It keeps all of the lids separated. It is one of those contraptions that once I tried it, I wondered how I ever got along without it.
Processing.
Read more...
Wednesday, April 29, 2009
Processing Canning Jars with the Water Bath Method
Right now I am alternating between recipes (for readers who have experience canning) and basic instructions (for anybody who is new to canning). My next recipe will be pickled asparagus. Then I will move on to recipes focusing on rhubarb and strawberries.
Water Bath Method
As mentioned in my first food safety post, the Water Bath method of processing canning jars should only be used for high acid foods such as fruits, pickles, and Jams. In this post I go into a step by step description of this processing method.
Supplies you will need
If you are new to canning, you can buy a Canning Kit rather than buying each piece separately.
Preparation
Filling the jars
. Place the lids in a separate sauce pot and cover them with hot water. Heat these to simmering (don't actually boil). An optional piece of equipment that can make this easier is a lid sterilizing rack. It keeps all of the lids separated. It is one of those contraptions that once I tried it, I wondered how I ever got along without it.
Processing.
Read more...
Friday, April 24, 2009
Headspace in Canning Jars

Headspace is the space between the top of the food and the rim of the canning jar.
During processing, the heat causes the contents of the jar to expand. Air escapes around the two piece lid. To ensure proper sealing, only two piece lids should be used for home canning. One piece lids are designed for commercial canning equipment.
After Processing, the contents of the canning jar contract as they cool and the lid is pulled down tight and the jar seals itself.
If you don't have enough headspace, the food might seep under the lid as the food expands and interfere with sealing.
If you have too much headspace, the processing time specified in the recipe may not be long enough to dirve out the air. This can also interfere with proper sealing of the canning jar.
Good canning recipes specify the headspace, but a general rule of thumb is use 1 inch for low acid foods (such as vegetables), 1/2 inch for fruits, and 1/4 inch for jams and jellies.
Read more...
Monday, April 20, 2009
Food Safety: Water Bath Verses Pressure Canner
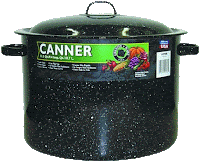
The water bath processing method is fairly simple and inexpensive. The filled canning jars are placed in the Canner, which has enough hot water in it to cover the canning jars. The water is brought to boiling and held at that temperature for the time specified in the recipe. This method is only safe for certain foods.
If a food is naturally high in acid (most fruits for example) or if acid is added to the food (for example the vinegar in pickles), then the acid helps to prevent the growth of bacteria. The heat from the boiling water is enough to destroy any harmful organisms that can survive in the acid.
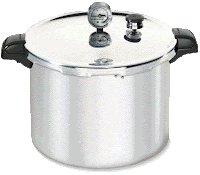
If the food is low in acid content (vegetables for example) then the temperature of boiling water is not enough to destroy the harmful bacteria that can live in these foods. Although it is more expensive, a pressure canner should be used for these foods. By increasing the pressure, we also raise the boiling point of the water and thus increase the temperature at which the filled canning jars are processed.
Fortunately good canning recipes tell us which method to use. For somebody who is new to canning, the Ball Blue Book has been a reliable source for generations. Some other sources that are a little newer on the block, but no less reliable are Canning & Preserving for Dummies
by Karen Ward, and Complete Guide to Home Canning and Preserving
by the U.S. Dept. of Agriculture.
One final comment about food safety is that the recipes need to be adjusted for high altitude. For the water bath method, the processing time needs to be increased. For the pressure canner method, the processing pressure needs to be increased. Reliable recipes will tell you what adjustments to make.
You can get more free information from the USDA Principles of home canning.
Read more...