Showing posts with label canning supplies. Show all posts

Monday, August 10, 2009

Decorative Canning Lids

I gave some ideas about how to make canned gifts look a little fancier. Another method that I didn't mention is to simply use decorative lids. They are more expensive then regular lids, so I would not use them just for putting up some corn or green beans for the winter, but they could be nice for gifts. There is a variety of designs to choose from.


The most decorative lids that I have seen are Bernadin brand. Don't let the fact that this brand is aimed at the Canadian market or that their jars are in metric sizes fool you into thinking that their lids won't work for American canning jars. Actually, Ball, Kerr, Golden Harvest, and Bernadin are all made by the Jarden corporation, and they all use the same size lids.
Read more...

Monday, July 27, 2009

Decorating Canning Jars


I will have to start all over making Christmas presents, but that is perfectly OK. It turns out that my treats are going to a better cause.


You see, the 3 year old granddaughter of a coworker of mine had to have her right eye removed because of cancer. I borrowed a picture of the girl from www.EyesForJaclyn.net. A child that age grows so fast, that a prosthetic eye has to be re-sized quite often. In fact, if the eye is not re-sized often enough to keep the pressure in the socket about equal to the pressure from the real eye, then the bones on each side of the face can actually start growing at a different pace, leading to a lopsided face. If you have ever felt that your child grows faster than you can get new clothes, then imagine how many eyes this girl will go through.

My jams will be among the items auctioned off for this girls fundraiser. Since I spent the weekend decorating the jars and boxing them up for the auction, I decided to write a post about different ways that canning jars can be made to look a little fancier. This is especially nice if you are giving food as gifts.

A very simple thing to do is simply tie a ribbon on the jar. You can also cut a circle or square of fabric and temporarily use a rubber band to hold it on the jar while you tie a ribbon on. If the rubber band is a pretty color, then you can just leave the rubber band in place and forget the ribbon. You can also put the cloth under the screw band.

Amazon.com offers a Decorative Jar Topper Kit. This has elastic bows, so you get the ease of using a rubber band, but it looks prettier than just a rubber band.

Another idea is crazy quilt jar toppers. These use up very small scraps of fabric. Queen of the Castle Recipes has a very nice post about these.


Read more...

Wednesday, June 24, 2009

Homemade Water Bath Canner

My first canner was actually homemade, and I still use it when I am making a small batch of something because it is smaller than most store bought canners. I don't have to heat up as much water. In fact, I just did a little arithmetic, and determined that it uses a little more than half as much water.


First you need a stockpot that is tall enough to be able to cover the jars with water. As you can see from the picture above, my homemade canner is nearly as tall as my other canner, but it is smaller in diameter.

The rack in a water bath canner serves two purposes. It keeps the jars slightly off from the bottom of the canner, and it makes it easy to lower the jars into the water. Lowering the jars into the water with a homemade canner is no problem. Just use your jar lifter.

If you can find a cake cooling rack that will fit into the bottom of the pot, that serves the purpose of holding the jars off the bottom. My pot is about 9 1/2 inches in diameter, so a 9 inch cake rack worked quite well. You can also try tying screw bands together as shown on this website. If you get creative, you can probably come up with other ways to make a homemade canning rack.
Read more...

Monday, June 15, 2009

Non-Reactive Pans

If you cook something acidic, such as tomatoes or pickling brine, in a pan that is made of aluminum or copper, the acid will react with the metal in the pan. Some of the molecules of the metal will leach into your food.


This can give your food a metallic taste. If you put the canned food that you cooked in this pan up on your shelf for later use, then while the jar is sitting there, the metal will gradually darken your food.

Because of their reaction with acid, pans made with aluminum or copper are called. "reactive pans." Cast Iron is a little less reactive, then copper or aluminum, but it is reactive.

To avoid this problem, you should use pans made with stainless steel, glass, or porcelain. It is OK if the pan has a copper or aluminum bottom, because the food won’t actually come into contact with the reactive metal in the bottom. If you use a granite ware pan, be sure that the porcelain coating is not chipped.
Read more...

Monday, June 1, 2009

Pressure Canners

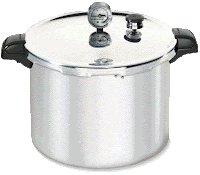
A pressure canner is a pressure cooker that is large enough to hold quart jars.

I still remember my mother sternly admonishing me not to mess with the pressure cooker, because it can explode. She did indeed succeed in scaring me enough that I decided to keep my distance from the pressure cooker. On the other hand, that fear was counter balanced by the fact that my mother used the pressure cooker countless times without any problem. The end result is that I am not afraid of pressure cookers, but I am afraid of people who don't read and follow instructions.


Since pressure canners vary from one model to another, I won't pretend that anything I write can replace the instructions that came withyour pressure canner. However I would like to write a little bit for people who may not have ever used a pressure cooker before.

Backup Safety Valves

New pressure canners have one or more backup safety valves in the lid. If the petcock (which is the primary safety valve) becomes plugged, then one of the backup valves will pop open to release steam.

A pressure canner that is more than about 30 years old might not have any extra safety valves in it. If you choose to use such a canner, then it is extremely important to keep the petcock clean and monitor the pressure.

Petcock

The petcock (which is also called a steam vent or a steam pipe) is the primary safety feature on a pressure canner. The backup valves should only come into use if the petcock is plugged. If your pressure canner did not come with a cleaning rod for the petcock, or if the cleaning rod has been lost, then pipe cleaners work well.

Dial Gauge or Rocker Weight

Pressure canners that use a rocker weight seem to be becoming less common all the time. This is probably because they are harder to learn to use. The one advantage that they do have is that they don't loose accuracy over time.

Dial gauges on the other hand, can loose accuracy. You should have them checked annually. The owners manual will usually give you an address that you can mail the gauge to and have it checked for free. I think the Presto corporation will check any model (not just their own). Alternatively, your USDA extension office may be able to check it or tell you where it can be done locally. You can find the nearest extension office with this map
.
Lid

The way the lid is fastened depends on the model. Be sure that the lid is always fastened properly and do not remove the lid until the pressure has returned to zero. Some pressure canners have a safety feature that prevents the lid from being removed while it is still pressurized, but I wouldn't rely on this. I say, "use your own head."

Sealing Ring

If your canner has a lid that fastens down by turning it, then it should have a rubber sealing ring. If it is dried up and stiff or if it is sticky, then it should be replaced.
Read more...

Monday, May 4, 2009

Processing Canning Jars with the Pressure Canner Method

Much of this is similar to the water bath method, so I debated about just saying "make these adjustments." For clarity sake, I decided to write the whole thing out.

Thank You, Moxie, for telling me how to get my blog to just show part of a post. Hopefully my decision to do that is an improvement.


Pressure canner Method

As mentioned in my first food safety post, the pressure canner method should be used for any low acid food such as vegetables or meat. In this post I go into a step by step description of this processing method.


Supplies you will need

  1. Pressure canner
  2. Canning jars: always examine the jars to be sure that there are no nicks in the rim
  3. Two piece lids
  4. Two sauce pots: one of them must be large enough to cover your canning jars with water.
  5. Tongs
  6. Canning funnel and a ladle
  7. Plastic spatula
  8. Dishtowel and a clean cloth
  9. Jar lifter
  10. Timer
  11. Whatever supplies you need for the recipe you are preparing

If you are new to canning, you can buy a Canning Kit rather than buying each piece separately.

Preparation

  1. Place clean canning jars in the large sauce pot and cover with hot water. Place the lids in a separate sauce pot and cover them with hot water. Heat these to simmering (don't actually boil). An optional piece of equipment that can make this easier is a lid sterilizing rack. It keeps all of the lids separated. It is one of those contraptions that once I tried it, I wondered how I ever got along without it.
  2. Place the canning rack in the pressure canner, add two to three inches of water and heat this to simmering
  3. While all of this is heating, prepare your food according to the recipe.
Filling the jars
  1. Use either the tongs or the jar lifter to remove a canning jar from the hot water and sit it on a dish towel.
  2. Use the canning funnel and a ladle to fill the jar with food, leaving the appropriate amount of headspace.
  3. Run the plastic spatula around the edge of the jar a couple of times to remove any air bubbles.
  4. Run a clean damp cloth around the rim of the jar to remove any food that may interfere with sealing.
  5. Place the lid on the jar. I use tongs to remove the lids from the hot water, but some people like to use a magnetic wand.
  6. Screw the band on just until resistance is felt. Remember that air needs to escapes during processing.
  7. Use the jar lifter to place the canning jar on the canning rack.
  8. Repeat these steps until all jars are filled.
Processing
  1. Place the lid on the canner and lock it down according to manufacturers instrucitons.
  2. Heat the water to boiling. Add the weight and bring to the pressure specified in the recipe (always read manufacturers instructions with a pressure canner).
  3. When the proper pressure is reached, start the timer and process for the time specified in the recipe.
  4. Turn off the heat and allow the pressure to return to zero.
  5. Remove the lid and let the jars sit in the water for 5 to 10 minutes to allow them to gradually adjust to the cooler temperature.
  6. Use the jar lifter to remove the canning jars. Place them on a dishtowel to cool. Leave an inch or so of space between them.
  7. After the jars have cooled for 12 to 24 hours, check the seals by pressing in the center of the lid. The safety button in the lid should not flex if the lid is sealed properly. If by chance you do come across a jar that is not sealed, place it in the refrigerator to be consumed within the next few days.

Read more...

Wednesday, April 29, 2009

Processing Canning Jars with the Water Bath Method

Right now I am alternating between recipes (for readers who have experience canning) and basic instructions (for anybody who is new to canning). My next recipe will be pickled asparagus. Then I will move on to recipes focusing on rhubarb and strawberries.

Water Bath Method

As mentioned in my first food safety post, the Water Bath method of processing canning jars should only be used for high acid foods such as fruits, pickles, and Jams. In this post I go into a step by step description of this processing method.


Supplies you will need

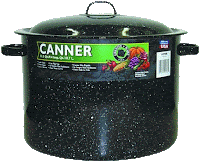
  1. Water bath Canner: this is a large granite pot with a canning rack that is used for lowering the canning jars into the hot water.
  2. Canning jars: always examine the jars to be sure that there are no nicks in the rim
  3. Two piece lids
  4. Two sauce pots: one of them must be large enough to cover your canning jars with water.
  5. Tongs
  6. Canning funnel and a ladle
  7. Plastic spatula
  8. Dishtowel and a clean cloth
  9. Jar lifter
  10. Timer
  11. Whatever supplies you need for the recipe you are preparing

If you are new to canning, you can buy a Canning Kit rather than buying each piece separately.

Preparation

  1. Fill canner 1/2 full of hot water. Put the rack in the elevated position (it hangs over the edge of the canner). Put the lid on the canner and place it on the burner and heat to simmering. It takes awhile for this much water to heat up.
  2. Meanwhile place clean canning jars in the large sauce pot and cover with hot water. Place the lids in a separate sauce pot and cover them with hot water. Heat these to simmering (don't actually boil). An optional piece of equipment that can make this easier is a lid sterilizing rack. It keeps all of the lids separated. It is one of those contraptions that once I tried it, I wondered how I ever got along without it.
  3. While all of this is heating, prepare your food according to the recipe.
Filling the jars
  1. Use either the tongs or the jar lifter to remove a canning jar from the hot water and sit it on a dish towel.
  2. Use the canning funnel and a ladle to fill the jar with food, leaving the appropriate amount of headspace.
  3. Run the plastic spatula around the edge of the jar a couple of times to remove any air bubbles.
  4. Run a clean damp cloth around the rim of the jar to remove any food that may interfere with sealing.
  5. Place the lid on the jar. I use tongs to remove the lids from the hot water, but some people like to use a magnetic wand.
  6. Screw the band on just until resistance is felt. Remember that air needs to escapes during processing.
  7. Use the jar lifter to place the canning jar in the elevated canning rack.
  8. Repeat these steps until all jars are filled.
Processing
  1. Lower the canning rack into the water. Be sure that the water completely covers the canning jars. If it doesn't, you can add the water that was used to heat the jars and lids. Put the lid on the canner and heat the water to boiling.
  2. When the water comes to a full boil, start the timer and process for the time specified in the recipe.
  3. Turn off the heat and use the jar lifter to remove the jars. Place them on a dishtowel to cool. Leave an inch or so of air space between the jars.
  4. After the jars have cooled for 12 to 24 hours, check the seals by pressing in the center of the lid. The safety button in the lid should not flex if the lid is sealed properly. If by chance you do come across a jar that is not sealed, place it in the refrigerator to be consumed within the next few days.
Read more...

Monday, April 20, 2009

Food Safety: Water Bath Verses Pressure Canner

The water bath processing method is fairly simple and inexpensive. The filled canning jars are placed in the Canner, which has enough hot water in it to cover the canning jars. The water is brought to boiling and held at that temperature for the time specified in the recipe. This method is only safe for certain foods.


If a food is naturally high in acid (most fruits for example) or if acid is added to the food (for example the vinegar in pickles), then the acid helps to prevent the growth of bacteria. The heat from the boiling water is enough to destroy any harmful organisms that can survive in the acid.

If the food is low in acid content (vegetables for example) then the temperature
of boiling water is not enough to destroy the harmful bacteria that can live in these foods. Although it is more expensive, a pressure canner should be used for these foods. By increasing the pressure, we also raise the boiling point of the water and thus increase the temperature at which the filled canning jars are processed.

Fortunately good canning recipes tell us which method to use. For somebody who is new to canning, the Ball Blue Book has been a reliable source for generations. Some other sources that are a little newer on the block, but no less reliable are Canning & Preserving for Dummies by Karen Ward, and Complete Guide to Home Canning and Preserving by the U.S. Dept. of Agriculture.

One final comment about food safety is that the recipes need to be adjusted for high altitude. For the water bath method, the processing time needs to be increased. For the pressure canner method, the processing pressure needs to be increased. Reliable recipes will tell you what
adjustments to make.

You can get more free information from the USDA Principles of home canning.
Read more...

Blog Widget by LinkWithin